
tutorial ten
How to make use of the "Yes/No button" field
The following lesson focuses on the “Yes/No button” field which is a useful tool for enabling you to include questions that only require “yes/no” responses from your form’s users. Remember that there are photos included in this lesson to help you to follow along with the steps.
Go to http://console.formpa.com/formpa.html
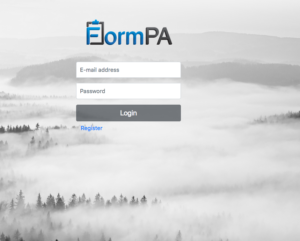
In the “username” section, type in your email address and then type in your password. Click “login” once you have filled out these fields.
You are now logged in and ready to explore FormPA.
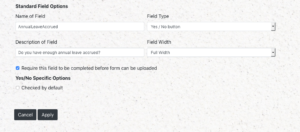
We will be continuing on the “Annual Leave” theme for our form. You will follow the same steps as other field types in order to use the “Yes/No button” field type in your forms. The only difference is that under the “field type” heading after you’ve filled in the “Name of Field” and “Description of Field” sections, you will select the “Yes/No button”. Please see the picture below.

Remember that it is up to you what you would like to label your “Name of Field”. As mentioned in previous lessons, you need to make sure that there aren’t any spaces between the words for example, “AnnualLeaveAccrued” not “Annual Leave Accrued”.
If you want to ensure all of the forms that are submitted include this field, make sure you tick the box beside “require this field to be completed before form can be uploaded”.
You will notice that there is a section called “Yes/No Specific Options”. If you tick beside the words, “Checked by default”. This means that the default response to the field will be “Yes” on your form. You will need to leave it unticked if you would prefer your users to select “Yes” rather than have it set as a default.
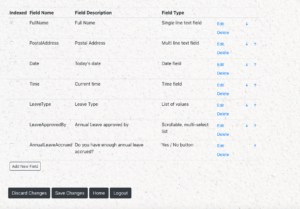
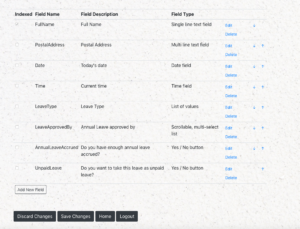
Click “apply” to save your changes. This will automatically take you back to the “edit layout” page. If you have done all of the previous lessons on field types, your screen will resemble the picture below.
Continuing along the annual leave theme for these lessons, another question that you might like to ask your users in this scenario is whether they would like to take the leave as unpaid leave. You should be currently on the “Edit Layout” screen. You will need to click on “Add New Field” and then follow the same steps as above to set up this field on your form. It is up to you what description you use in the “Name of Field” and “Description of Field” sections.
At this point, your screen should look like the example below. Please note that it is recommended that you leave the box unticked in the section called “Yes/No Specific Options”. If at any point you need to go back to the home screen, please make sure you click on the “save changes” button down the bottom or else you will lose your data. From there, click on the “home” button to go back to the main screen.
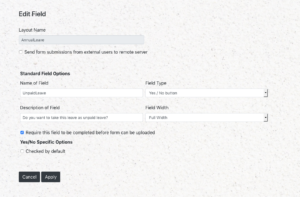
Please make sure that you click “apply” once you have finished editing the field. You will be taken back to the “Edit Layout” screen.
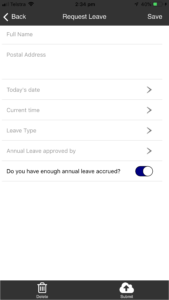
This picture below shows what the section will look like on the user’s mobile version of FormPA when they select “yes” to a question such as “Do you have enough annual leave accrued?”. The button will be blue in colour as a result of the user selecting “yes”.
Your “Edit Layout” screen will look very similar if not identical (if you have used the exact same details as outlined in the lessons) to the example below.
Click on the “Home” button to go back to the main page.
This concludes Lesson 9, we hope that it has been helpful to you. Here at Tech Strategies, we are always looking for ways to help our users to optimise their usage of our product. Please contact us if you have any feedback in this area.
Click on “save changes” before logging out of FormPA. If you click on this button and find that it does not respond, this means that your changes have already been saved in the previous screen. You are now safe to “Log out” completely out of FormPA if you wish to do so.
Ready to continue learning more about fields, see below!
There are 13 fields that you can choose from in FormPA. Click on any of the fields below to see a lesson on how to add them to your form layout.
- Single line text field
- Multi line text field
- Date field
- Time field
- List of values
- A scrollable multi-select list
- Yes/No button
- Signature field
- Image upload
- Form
Are you ready to explore our other lessons? Click here to return to the list of tutorials