
tutorial eight
how to use the list of values field type
In this tutorial, you will learn about the field type, the list of values. Using the “list of values” field type on your forms will mean that your users will have the ability to select from a scrollable list. They can only select one from this list. The “scrollable, multi-select list” field type is the one to use instead if you want them to be able to select multiple items on a list. For a lesson on this field, please click here.
Go to http://console.formpa.com/formpa.html
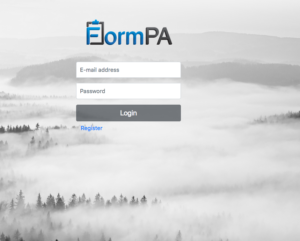
In the “username” section, type in your email address and then type in your password. Click “login” once you have filled out these fields.
You are now logged in and ready to explore FormPA.
How to use the list of values field type for your data collection:
This lesson follows on from previous lessons, in particular tutorial 3 which explains how you use field types in your forms.
In order to use the “list of values” field type, you will follow the same steps as other field types. The only difference is that under the “field type” heading after you’ve filled in the “Name of Field” section, you will select the “list of values”. Please see the picture below.
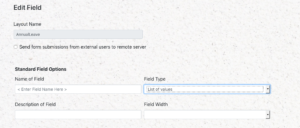
For information on your form that you would like all users to fill in before submitting a form, you will need to tick the “require this field to be completed” section. This means that the user will not be able to submit the form to the server if they have overlooked filling in a mandatory field.
Now let’s move onto the next step – you will notice that there is a heading on the page entitled, “List Specific Options”. You will need to select “List of values” from the drop down menu under the the “Source of list” heading.
You will notice when you selected the “list of values” that there were multiple options. These are more advanced options that will be covered in later tutorials.
In order to set the items that the user can select from, go to the heading, “Source Values” and click “Add New Item”. You may add as many items here as you wish. For the purpose of this lesson, we have set three different items for the leave type e.g. Holiday/Professional Development/Bereavement Leave. The user will only be able to select one of these, as mentioned earlier in this tutorial, the field type to use if you want them to select more than one item is the “scrollable, multi-select list”.
You can leave the “field subscription group” blank and the “field subscription type” to “No subscription”. See picture below.

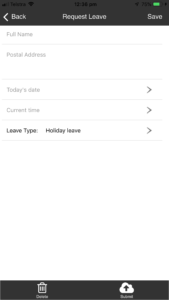
There is a heading underneath this section called, “Prefix field contents…when displaying information”. This function comes in handy for when the user is filling out the form on their mobile version of FormPA. It means that they will be able to see for example, the words “Leave Type” beside their item selection. The picture below shows how this will look on the FormPA mobile version.
It is important to make sure you click the “apply” button to save your changes. Clicking on this will take you back to the “edit layout” page, you will need to click on “save changes” to ensure that your data is not lost.
This is what your screen will look like after creating all of those new fields.
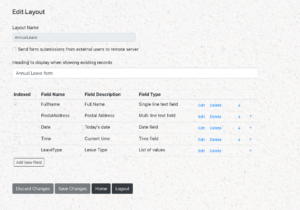
If you would like to go back to your home screen for FormPA at any point, click on the “home” button.
Make sure that you select “save changes” before logging out of FormPA. If you click on this button and find that it does not respond, this means that your changes have already been saved in the previous screen. You are now safe to “Log out” completely out of FormPA if you wish to do so.
Ready to continue learning more about fields, see below!
There are 13 fields that you can choose from in FormPA. Click on any of the fields below to see a lesson on how to add them to your form layout.
- Single line text field
- Multi line text field
- Date field
- Time field
- List of values
- A scrollable multi-select list
- Yes/No button
- Signature field
- Image upload
- Form
Are you ready to explore our other lessons? Click here to return to the list of tutorials