
tutorial seven
how to save and retrieve forms on your mobile version of FormPA
This lesson shows you how you can use the field types (only certain field types can be used for this function) to create a search option for your forms when they are in draft forms only.
This lesson builds on what you have learned in the previous tutorials. You will need to have done the lesson on field types in order to complete this one.
Go to http://console.formpa.com/formpa.html
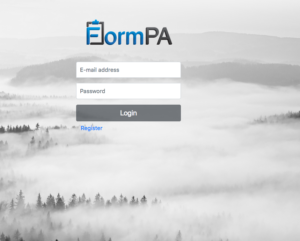
In the “username” section, type in your email address and then type in your password. Click “login” once you have filled out these fields.
You are now logged in and ready to explore FormPA.
This tutorial follows on from the previous ones which means that you may still logged into your mobile FormPA if you have just completed tutorial 6. You need to log out of this before doing the following tutorial.
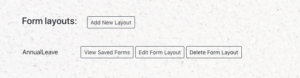
On the main page of FormPA, there is a heading called “FormLayouts”. Under this heading, look for the form layout that you have created as part of the previous lessons.
Click on “Edit Form Layout”.
Now go to one of the fields that you have already created. Click on the “edit” option (on the right hand side of the “field type” column).
Once you have clicked on the “edit” option, you will notice that there is a heading called “search/index options”. Tick the box to make the field searchable. By ticking this box, this will mean that you are now able to search and locate forms which have been submitted to the server. Please note that there are only certain fields that can be used as a search option. These are the list of values, date, time and single line text fields.
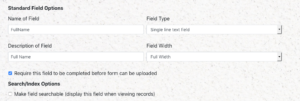
The search/index option controls what is displayed when you are looking at any draft forms. When viewing these drafts, you can have up to 3 fields that can be shown. For this purpose, we will select just one field to be displayed, click on “column 1” under the first heading and then click “100%” to make it full size. Make sure you leave all other settings the same. You will have already set them up correctly when completing one of the previous lessons on field types.

Click “apply” to save your settings. You will then be taken back to the “edit layout” screen.
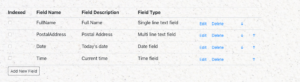
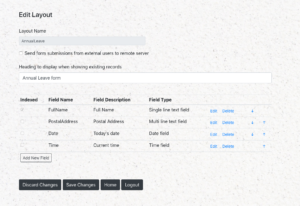
If you have a look at the list of fields, you will notice a column called “Indexed”. The field type that you set as the one to search under will have a tick in this column. Please see the picture below for how it should look.
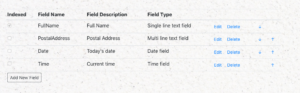
This is what your “edit layout” will look like after you have completed those steps.
Now that you have created the ability to search your forms, please log into the mobile version of FormPA. Click on “Request Leave” button and fill in some details. Save the form as per tutorial 6, you can refer to this lesson if you have any issues.
The next step is to select the “Leave forms” button. Your screen should look similar to the image below.

In tutorial 6, you were unable to see any forms that you had filled in and saved. The indexing that you created in this tutorial with the field, “Full Name”, meant that you were able to view your saved forms in the mobile version of FormPA.
Click on the “Home” button to go back to the main page. Click on “save changes” before logging out of FormPA. If you click on this button and find that it does not respond, this means that your changes have already been saved in the previous screen. You are now safe to “Log out” completely out of FormPA if you wish to do so.
There are 13 fields that you can choose from in FormPA. Click on any of the fields below to see a lesson on how to add them to your form layout.
- Single line text field
- Multi line text field
- Date field
- Time field
- List of values
- A scrollable multi-select list
- Yes/No button
- Signature field
- Image upload
- Form
Are you ready to explore our other lessons? Click here to return to the list of tutorials